There's an undeniable magic in a homegrown tomato. Forget the pale, often flavorless supermarket imposters; biting into a sun-ripened tomato plucked fresh from your own garden is a sensory explosion, a vibrant taste of summer that simply can't be replicated. It's an experience akin to comparing a luxurious cashmere throw to a scratchy airline blanket – truly in a league of its own. If you're eager to unlock this culinary delight and discover how to grow tomatoes from seed, you've come to the right place. While the journey from a tiny seed to a bountiful harvest involves care and effort, the rewards are immeasurable. The crucial first step to success? Timing.
Embarking on the adventure of growing your own tomatoes from seed allows you to explore an incredible diversity of varieties, from obscure heirlooms with unique flavors and stunning colors to classic robust beefsteaks and sweet cherry tomatoes. This guide will walk you through the essential steps, focusing on the critical timing involved to ensure your seedlings are robust and ready for their outdoor debut precisely when conditions are optimal.
Understanding Your Last Frost Date: The Foundation of Success
The cornerstone of successful tomato seed starting lies in accurately identifying your region's average last frost date. This seemingly simple piece of information is the master key that unlocks your entire planting schedule. The last frost date is essentially the average calendar date of the final freeze in spring, signaling when the danger of frost has largely passed and the weather begins its consistent warm-up.
So, how do you find this all-important date? Several resources can help:
- Online Gardening Calculators: Many reputable gardening websites offer tools where you can input your ZIP code to find your average last frost date.
- Local Extension Offices: Your local agricultural extension office is a fantastic resource, providing climate-specific information tailored to your area.
- Historical Weather Data: A quick search for historical weather patterns in your town can also provide insight.
Once you've pinpointed your last frost date, the next step for those learning how to grow tomatoes from seed is surprisingly straightforward: count five weeks backward on your calendar. This five-week window is the sweet spot, providing your tomato seedlings with enough indoor growth time to develop into strong, healthy young plants ready for transplanting. Garden experts, like Charlie Nardozzi, emphasize that tomatoes generally require about four to six weeks of indoor development before they're robust enough to face the outdoor world.
Expert Tip: If you opt to skip the seed-starting process and purchase young plants from a nursery, aim to plant them in the ground in late spring. The key indicator for these seedlings is when nighttime temperatures consistently remain above 50 degrees Fahrenheit (10 degrees Celsius).
Choosing Your Tomato Varieties: A World of Flavor Awaits
With your planting timeline established, the truly exciting part begins: selecting which tomato varieties to cultivate! This decision is more than just practical; it's a dive into a vibrant world of colors, shapes, and flavors. Understanding how to grow tomatoes from seed also means knowing what kind of plant you're nurturing.
Heirloom vs. Classic Varieties
- Heirlooms: These open-pollinated varieties have been passed down through generations, cherished for their unique characteristics. As Nardozzi highlights, varieties like Persimmon, Tasmanian Chocolate, and Speckled Roman boast vivid colors, distinctive shapes, and unparalleled taste. While they sometimes require a bit more care, their complex flavors are a true reward.
- Classic Varieties: Popular choices like cherry and beefsteak tomatoes are always reliable. Cherry tomatoes offer sweet, bite-sized bursts of flavor perfect for salads, while beefsteaks provide large, juicy slices ideal for sandwiches and burgers. Many classic varieties are also bred for disease resistance and higher yields.
Determinate vs. Indeterminate: Understanding Growth Habits
Your available space and desired harvest schedule will influence your choice between determinate and indeterminate varieties:
- Determinate Tomatoes: These "bush" varieties typically grow to a compact size (around 2 to 3 feet tall) and produce most of their fruit within a relatively short, concentrated period. They're excellent for smaller gardens, containers, or if you plan to can or process a large batch of tomatoes all at once.
- Indeterminate Tomatoes: Often called "vining" tomatoes, these varieties continue to grow taller and produce fruit continuously throughout the growing season until frost. They require staking or caging for support but offer a steady supply of fresh tomatoes for months. If you have ample space and want a continuous harvest, indeterminate varieties are your best bet.
Consider your climate, too. Some varieties thrive in cooler conditions, while others prefer intense heat. Reading seed packet descriptions will provide valuable insights into each variety's specific needs and characteristics.
Your Indoor Seed Starting Checklist: Nurturing Future Harvests
Now that you know when and what to plant, let's dive into the practical steps of starting your tomato seeds indoors. This careful indoor cultivation is paramount to learning how to grow tomatoes from seed successfully.
Gathering Your Supplies
Before your target sowing date arrives, ensure you have these essentials:
- Quality Tomato Seeds: Choose varieties that excite you and suit your growing conditions.
- Seed Starting Mix: A sterile, fine-textured mix designed for seedlings. Avoid garden soil, which can be too heavy and contain pathogens.
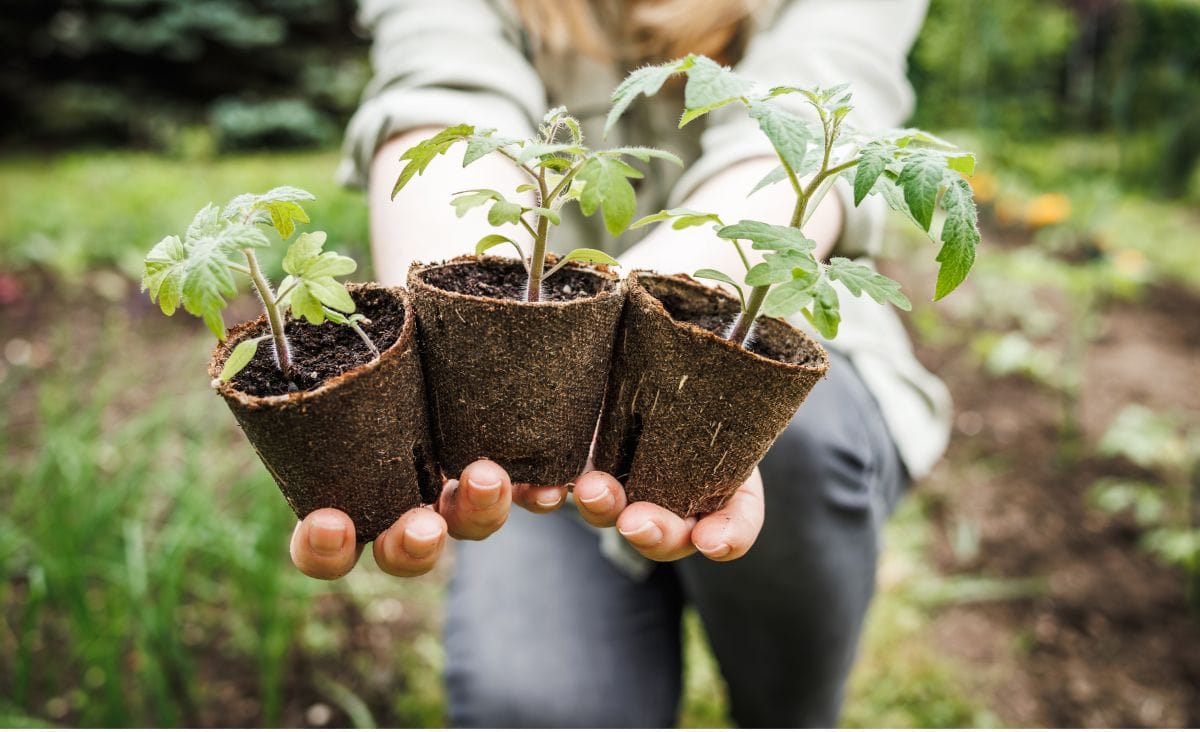
- Seed Starting Containers: Biodegradable options like 2-inch x 2-inch cow pots are excellent as they reduce transplant shock. Alternatively, use plastic seed trays or small pots with drainage holes.
- Watering Can/Sprayer: For gentle watering.
- Labels and Marker: Crucial for keeping track of your varieties.
- Heating Mat (Optional but Recommended): For faster germination.
- Grow Lights (Optional but Recommended): Especially if natural light is insufficient.
The Sowing Process
- Prepare Your Pots: Fill your chosen containers with seed starting mix, gently moistening it before planting.
- Plant the Seeds: Plant one to two seeds per pot, typically about ¼ inch deep. If planting two, you'll thin them later.
- Provide Warmth: Place the pots in a warm indoor location. For optimal and faster germination, consider placing a heating mat specifically designed for seedlings underneath your pots. This bottom heat significantly encourages sprouts to emerge.
- Ensure Adequate Light: Once germinated, your seedlings need at least six hours of bright, direct sunlight daily. A south-facing window can work, but for truly strong and stocky plants, supplemental grow lights are often necessary. Position lights just a few inches above the seedlings and adjust as they grow.
- Water Regularly: Keep the soil consistently moist but never waterlogged. A gentle mist or bottom watering (where pots soak up water from a tray) prevents disturbing delicate seedlings.
- Thinning for Strength: When your seedlings develop their first true leaves and break out into a "y" shape (or show two distinct stems), it's time to thin. Identify the weaker of the two sprouts and carefully snip it at ground level with small scissors. This ensures the stronger seedling receives all the resources to thrive.
- Potting Up: Allow your remaining sprout to grow until it's about three times the height of its initial pot, typically around 6 inches tall. At this stage, it's time to transplant this seedling into a pot one size larger (e.g., a 4-inch pot). This gives its roots more space to develop before moving outdoors.
For more detailed insights on optimizing your initial growth phases, you might find Grow Better Tomatoes: Expert Guide to Seed Starting Success to be an invaluable resource.
The Transition to the Great Outdoors: Hardening Off Your Seedlings
After weeks of nurturing your delicate seedlings indoors, you can't simply plop them directly into the garden. They need a crucial acclimatization period known as hardening off. This process gradually introduces your plants to the harsher outdoor elements – direct sunlight, fluctuating temperatures, and wind – preventing transplant shock and ensuring their survival. This is a vital step in mastering how to grow tomatoes from seed into thriving garden plants.
The Hardening Off Schedule (Typically 7-14 Days):
- Day 1-3: Place your seedlings in a sheltered, shady outdoor spot for just a few hours (2-3 hours) during the warmest part of the day. Bring them back inside in the evening.
- Day 4-6: Increase their outdoor exposure to 4-6 hours daily, moving them to a spot with partial shade or dappled sunlight. Continue bringing them indoors at night.
- Day 7-9: Extend their time outdoors to 6-8 hours, introducing them to slightly more direct sunlight.
- Day 10-14: If nighttime temperatures are consistently above 50°F (10°C), you can begin leaving them outdoors overnight in a protected location. Ensure they receive full sun exposure during the day.
Throughout this period, monitor your plants closely. If they show signs of stress (wilting, yellowing leaves), reduce their exposure slightly. Water them regularly, as they will dry out faster outdoors. By the end of two weeks, your tomato plants will be robust and ready for their permanent home in the garden, usually a week or two after your last frost date. This careful transition is key to a successful journey from seed to harvest. For a comprehensive guide on cultivating a bountiful yield, check out From Seed to Summer Harvest: Your Guide to Homegrown Tomatoes.
Ongoing Care for Thriving Tomato Plants
Once your hardened-off tomato plants are safely in the ground, the journey continues with consistent care to ensure a prolific harvest:
- Deep Watering: Tomatoes need consistent moisture. Water deeply and regularly, especially during dry spells, aiming for the soil rather than the foliage to prevent fungal diseases.
- Fertilization: Begin feeding your plants with a balanced fertilizer once they start producing flowers, and continue every few weeks according to package directions.
- Support Systems: Indeterminate varieties, in particular, will require staking, caging, or trellising to support their vigorous growth and heavy fruit load. Install these supports early to avoid damaging roots later.
- Pollination: While many tomato varieties are self-pollinating, encouraging pollinators in your garden (bees, wind) will improve fruit set. Gently shaking your plants can also help with pollen release.
- Pest and Disease Management: Regularly inspect your plants for signs of pests or diseases. Early detection and organic treatments can prevent major issues.
With proper care and attention to detail, your tomato plants will flourish, providing you with a summer-long supply of the most delicious tomatoes you've ever tasted.
The journey of how to grow tomatoes from seed is an incredibly rewarding one. From the tiny sprout nurtured indoors to the towering plant laden with juicy fruit, each stage offers its own satisfaction. By understanding your last frost date, carefully timing your indoor seed starting five weeks prior, selecting appropriate varieties, and providing consistent care, you're well on your way to enjoying the unparalleled pleasure of homegrown tomatoes. There's nothing quite like harvesting the fruits of your labor, knowing that every vibrant slice and burst of flavor began with a tiny seed in your hands. Happy growing!
